By Jim Gordon
Data tables in web pages can be
displayed using a variety of programming techniques. The web
query technique works only with tables displayed on web
pages using Hypertext Markup Language (HTML). Excel reads
the HTML code of the web page and looks for table tags that
specify the beginning and end of a table. If you use the
View Code capability of most web browsers, you will find
HTML tables with these beginning and ending tags:
<HTML> through </HTML>
Data can be displayed in rows
and columns that look exactly like HTML data tables using
other methods, such as Javascript.
Excel web query is not able to detect tables that are the
result of alternative techniques.
Your Mac must have a live internet connection to run queries on web pages that are found on the internet.
There are two ways to run a web
query in Microsoft Excel. The first is by using the menus.
The second is by using Visual Basic for Applications.
To refresh the data from the web
page, select any cell within the query results. Then on the
Menu Bar choose Data > Refresh. You may
also use the Data Tab on the Ribbon and choose Refresh.
Web query results are displayed
differently in Excel from the way the look on a web page.
Formatting is minimally retained. Hyperlinks may or may not
work. "Relative" hyperlinks and specialty hyperlink
protocols will not work when clicked.
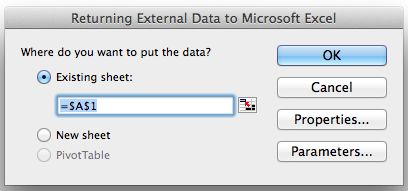
The result set querytable of a
web query has many properties you can control. When you
first make your web query, there are settings available to
you in the Returning External Data to Excel dialog (see
Figure 1).
Figure 1 - Returning External
Data to Excel
Click the Properties button to
display the External Data Range Properties dialog
when you first make a query. You can also display this
dialog by right-clicking into the querytable result set and
choosing Data Range Properties from the pop-up menu. The
options presented are context sensitive. Not all options are
available for web queries.
Figure 2 - External Data Range
Properties

If your web query is dynamic
(requests a parameter), the Parameters button
becomes available in the Return External Data to Excel
dialog box. Click the Parameters button to display the Parameters
dialog, (see Figure 2). In this dialog you can modify
the text of the prompt, enter a value to always use, or
choose a cell and use that cell's value to satisfy the
prompt. The Parameters dialog can also be displayed by
right-clicking in the querytable result set of a parameter
query and choosing Parameters from the pop-up menu.
Note the option to "Fill down
formulas in columns adjacent to data." Enabling this option
lets you use calculated columns with the web query result
set.
Figure 3 - Parameters
